Coke Gun
This is my Coke gun. It is a very simple and inexpensive pneumatic. I know a ball valve is not the valve of choice, but I just wanted a very simple gun. I recently saw a launcher called Trident, made by the folks at WB6ZQZ. This gun got me in the mood to design, so I picked up a few things at work. This is probably the single most wrong thing you can do with a Coke bottle, but ah well, as they said on the website with Trident, they have been tested to 160psi. I hate to be disclaimerish, but this launcher really shouldn't be made unless you are aware of the risk. I also do not have a pressure gauge, which is bad, but my 12v compressor has a gauge built into it. I take precautions while filling the launcher, and I have shot it 20 times aired up to 80psi, and it shows no weakness. The gun is extremely light weight, it weighs about 2 pounds.
The Barrel is made of 3/4" CPVC, which is a pretty decent fit for paintballs (OOOH OOOH PAINTBALL SNIPER RIFLE!!!!! LOL). The CPVC is attached to the PVC via threaded adapters, so there is no issues about proper solvent welding.
Parts list:
Wild Bird feeder, 1/4" sliver of 1" PVC, two 1" street elbows, short section of 3/4" PVC, 3/4" male adapter, 3/4" ball valve, 3/4" CPVC male adapter, 3/4" CPVC.
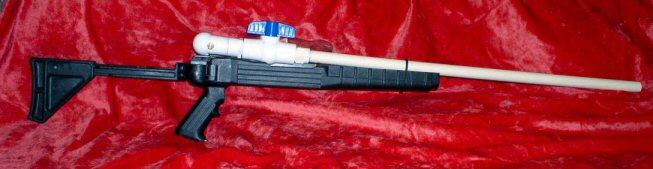
Coke Gun before sprinkler upgrad
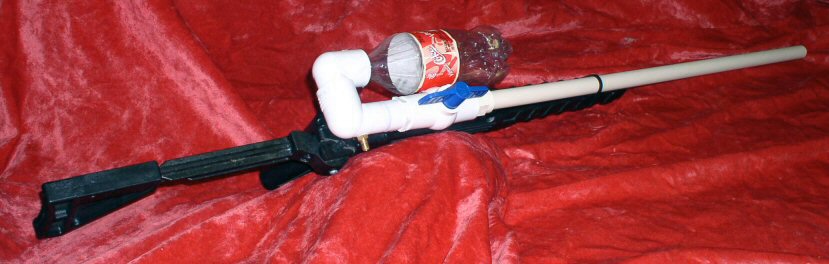
Top View showing chamber (before upgrade)
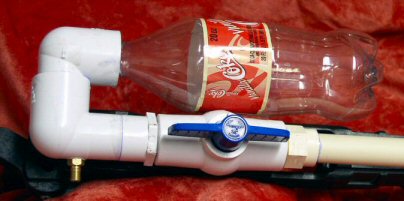
Close up of chamber and 3/4" ball valve (before upgrade)
Bottle adapter assembly
A pop bottle won't attach directly with PVC. The Trident gun featured a lathe cut threaded insert. Cutting threads with a lathe wasn't an option for me then, so I decided to improvise. I used a "Wild Bird Feeder" attachment and adapted it to use for spudguns. Here is a pic of the Wild Bird Feeder:
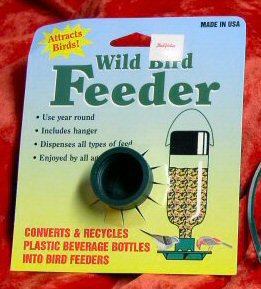
The feeder package
Basically the procedure went like this: I checked the size
of the bird feeder and it would fit into a 1" coupling just right. I
cut the threaded part off the bird feeder and discarded the rest. The
threaded insert ended up about .4" long, and was roughed up with a
Dremel tool, as was .4" of the inside of the 1" street
elbow. I then used a silicon to stick the adapter into the elbow. A
silicon was chosen to keep the fitting air tight. Next I cleaned off any
excess silicon so I could have a proper solvent weld on the next step. I
cut a sliver of 1" PVC about .25" long, to glue on top of the
green thread insert. This would make sure that the insert could not come
out even if the silicon was not structurally sufficient. The 1" PVC
sliver was bored out using a Dremel tool, just enough to allow the Coke bottle
to pass through.
"Pop" Bottle threads. There is water in the coupling because I
just submersed it to check for leaks.
Upgrade:
Set screw upgrade: Just to be safe
I upgraded the bottle adapter to include set screws to hold the bottle in "just in case." They rest on the lip around the bottle. I haven't had any trouble, but I believe the weakest part would be the bottle adapter. I added them just to be safe, I wouldn't want the bottle shooting back at me at 160psi!
I plan on painting this launcher with some "fusion paint" to make it look a little better on the gun stock. I will not paint the Coke bottle, as the fusion may weaken it.
Pneumatic Sprinkler Valve Upgrades:
Wow!!!!!!! I am almost speechless after seeing the improvement in performance! It was cool and fast before, but HOLY CRAP does the sprinkler valve make a difference! I ran my gun specs on GGDT (Gas Gun Design Tool) and figure at 100psi, I am reaching speeds in excess of 520 fps. Could you imagine being hit with a paintball at 520 fps? That is not a pretty thought. There is no way the gun is safe for human targets at these velocities, luckily at 40psi it shoots at a safer paintball speed. If you ever wondered what a paintball would do at 520 fps, take a look at the plastic barrel I shot from 20 ft away. Those 55 gallon plastic barrels are really tough too!
Coke Gun Upgraded with Pneumatically Actuated Sprinkler Valve
Close up of Valve and Trigger Mechanism
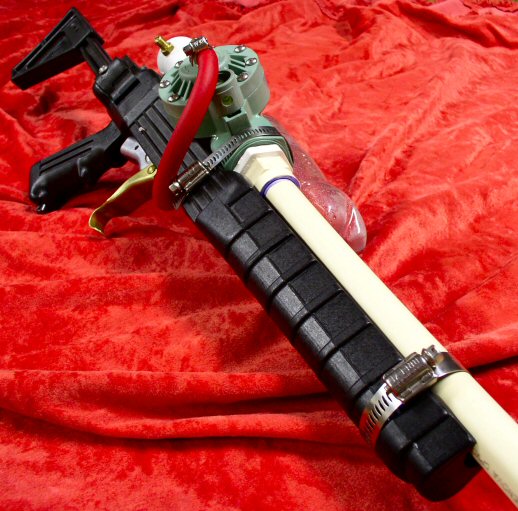
A little different angle...
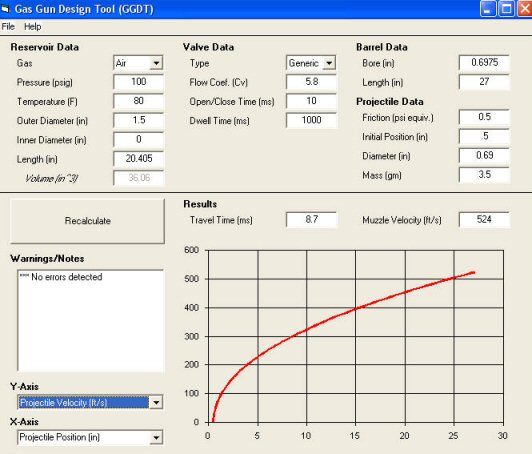
GGDT Data Sheet
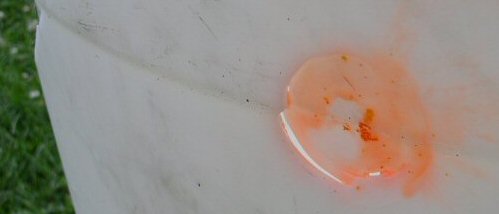
Paintball Damage to the Plastic Barrel

Click For larger version.
Due to popular demand here are the plans:

www.advancedspuds.com